The Event Management Table 📊
The Events Management table lets you view (click on any application ID to see the application), sort, and manage applications all in one place. The following columns always display: flag, artist application ID, status, first name, and last name. You can customize the rest of the table by clicking Table Editor and selecting up to eight additional fields.
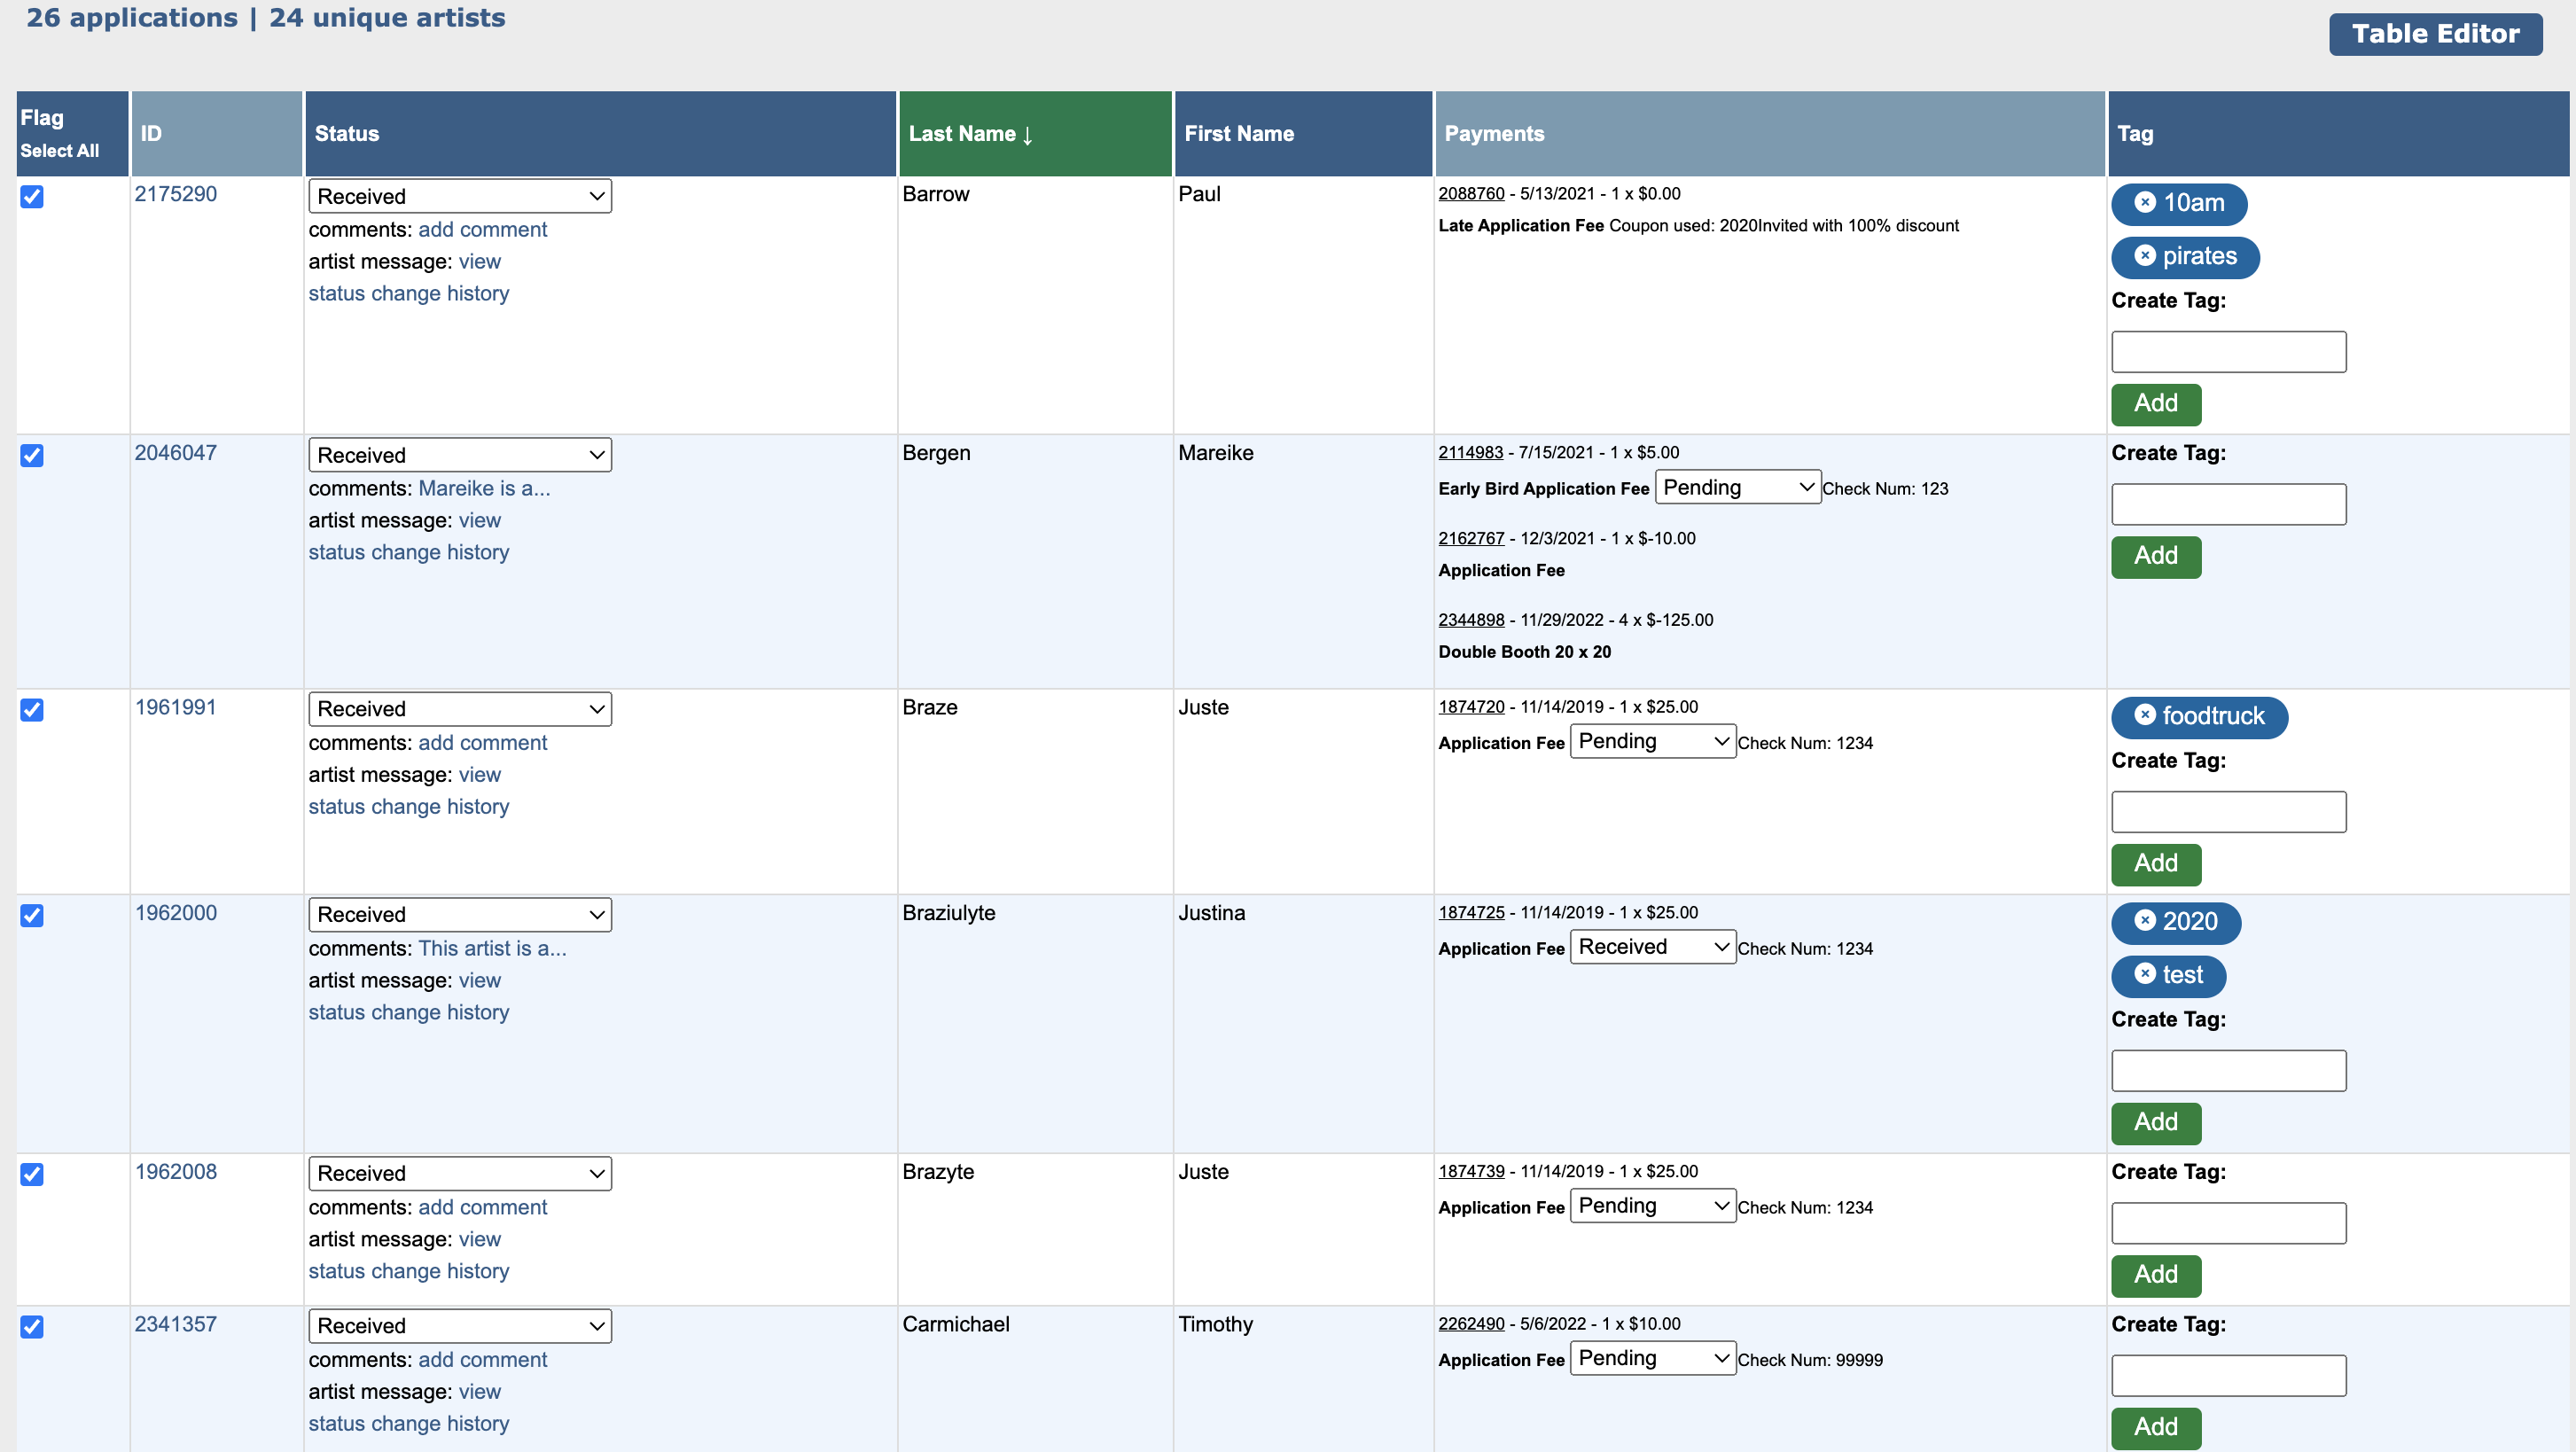
From this table, you can also:
Change applicant statuses using individual drop-downs, or update multiple applications at once using the drop-down below the table and clicking Change.
Flag applications by checking the box in the Flag column.
Tag applications by entering a tag in the Create Tag field and clicking Add. Add up to 10 tags per application.
Be sure to click Update All to save your changes.
⚡ TIP: Use tags to limit purchases to a specific audience. Learn more about purchasing restrictions.
💡 Filtering Applications
To narrow your list and find specific applicants (like those who applied in the Jewelry category or who purchased a double booth), use the Search Applications panel.
Click into the Filter Applicants by field of the Search Applications section and choose one or more filters:
All Applications (default)
Status
Medium Category
Purchased Products
Tags
Flags
Sub-filters will appear based on what you selected. Click into each sub-filter to refine your display.
Click Search to display matching applications.
🔍 Example: To view Jewelry applications in the Confirmed status:
Select the Status and Medium Category filters.
Choose Confirmed in the Status field.
Choose Jewelry in the Medium Category field.
Click Search.

Viewing an Image Slideshow
Before or after you review artist submissions, you may want to view a slideshow of images only. To do this:
Click on a status you want to view, or select Click Here to view images from applications in every status.
Scroll down below the Event Management table and click View Slideshow.