

Changing Application Statuses Based on Scores 📈
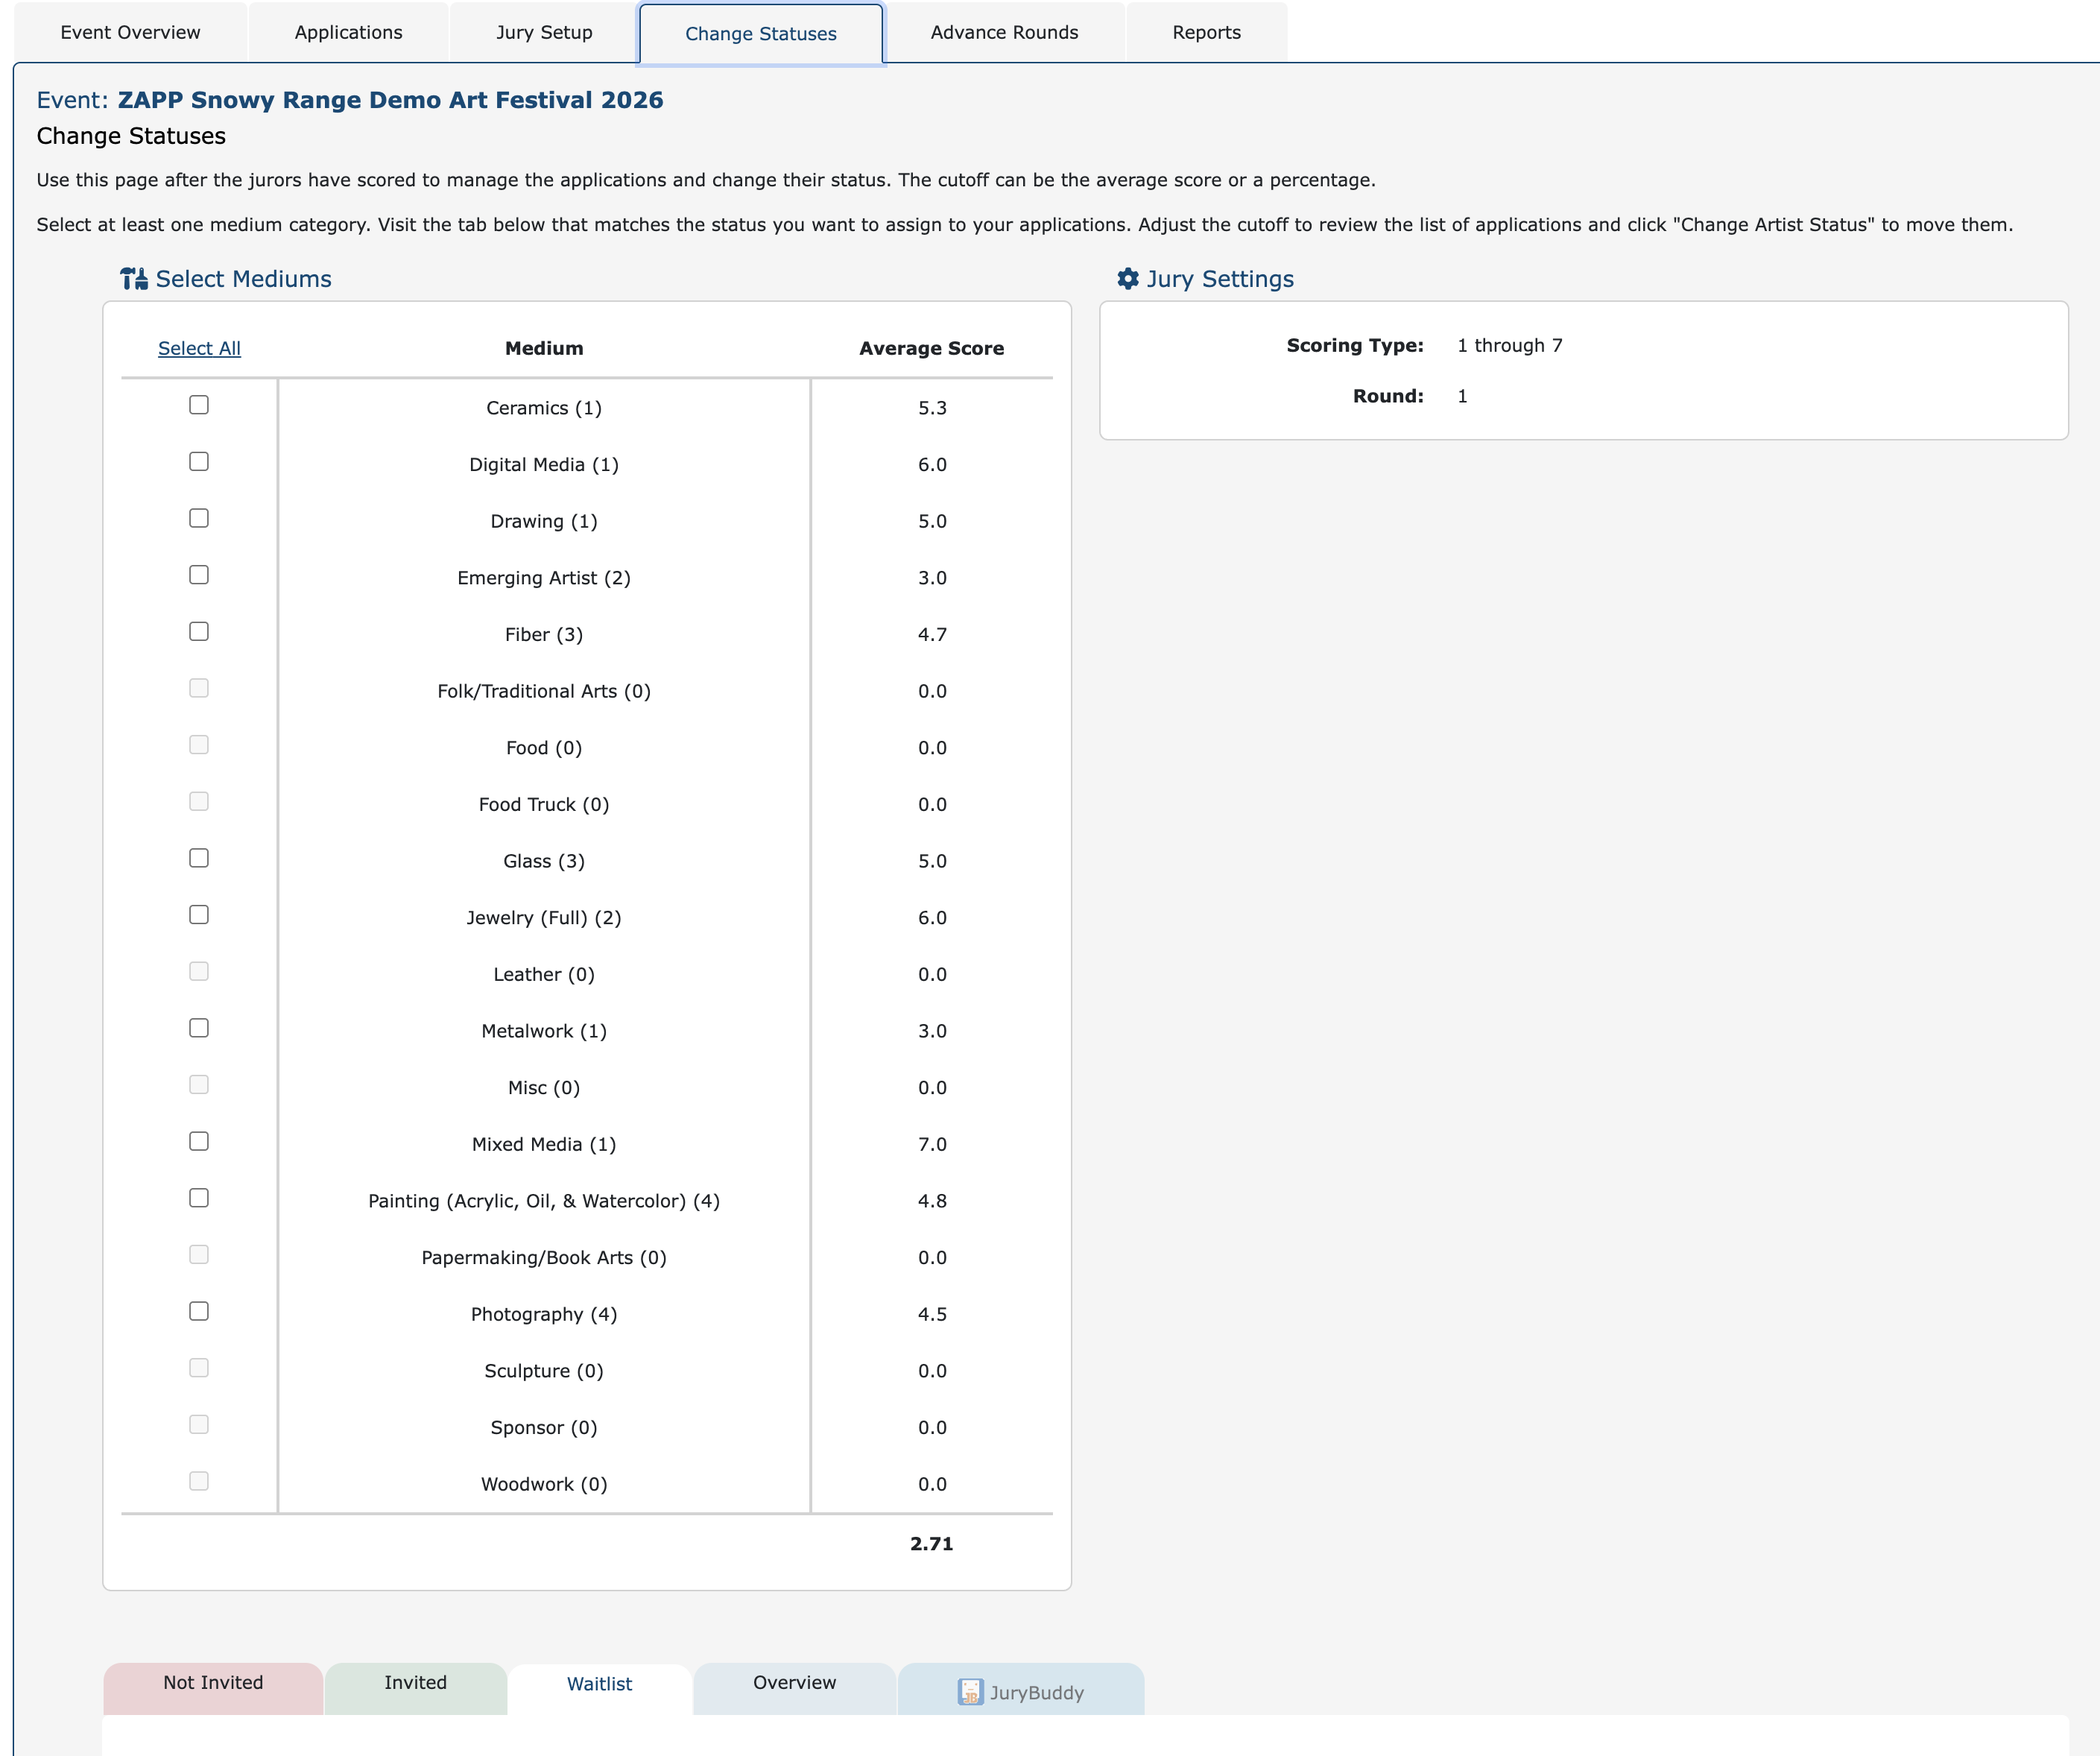
After jurors have finished scoring and you’re ready to begin creating your pool of Invited, Not Invited, and Waitlisted artists, go to the Change Statuses tab in the Jury Administration page.
You will see a Select Mediums table showing:
Each medium category
The average score per category (used as the default removal cutoff)
Below the table, you’ll see tabs where you will review and apply scoring cutoffs to finalize your jury results.
To begin:
Select the medium you wish to set a cutoff for, or click select all to set cutoffs for all categories at once.
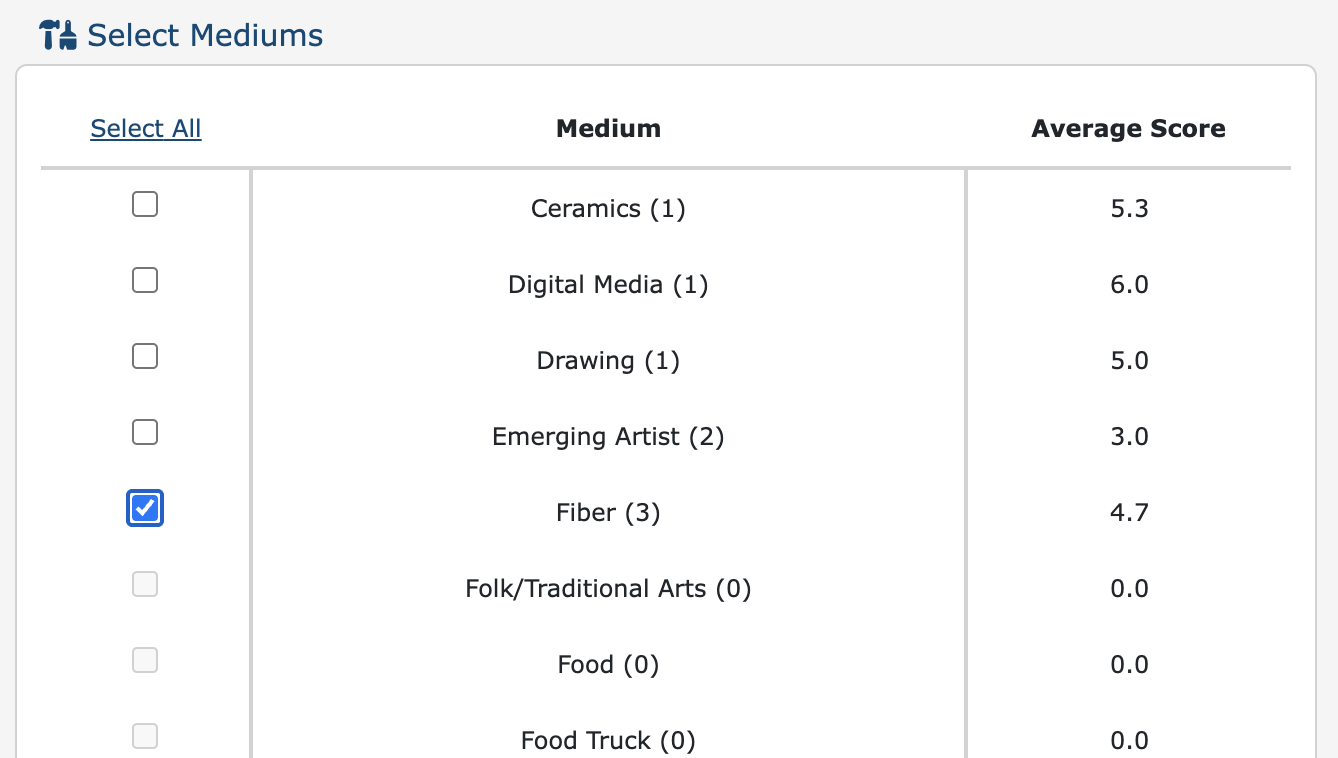
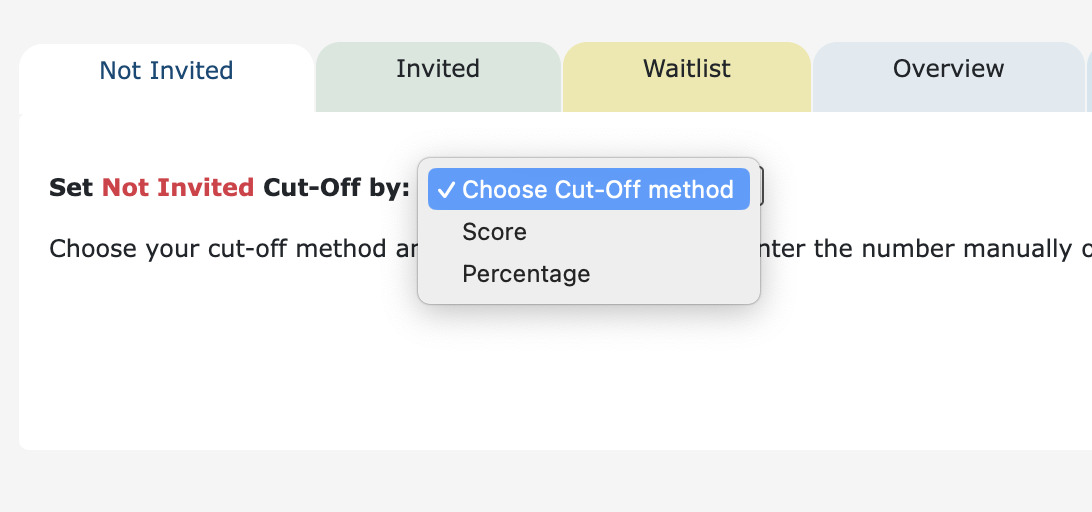
Start on either the Not Invited or Invited tab. Select your cut-off method. You can choose to apply a scoring cut-off by score or percentage.
Score: This will remove or invite artists based on their average score.
Ex. You want to invite applicants who scored 4.5 or higher.
Percentage: This will remove or invite artists based on the percentage you need removed or invited within that medium category.
Ex. You want to reject the lowest scoring 10% of applicants in the jewelry category.
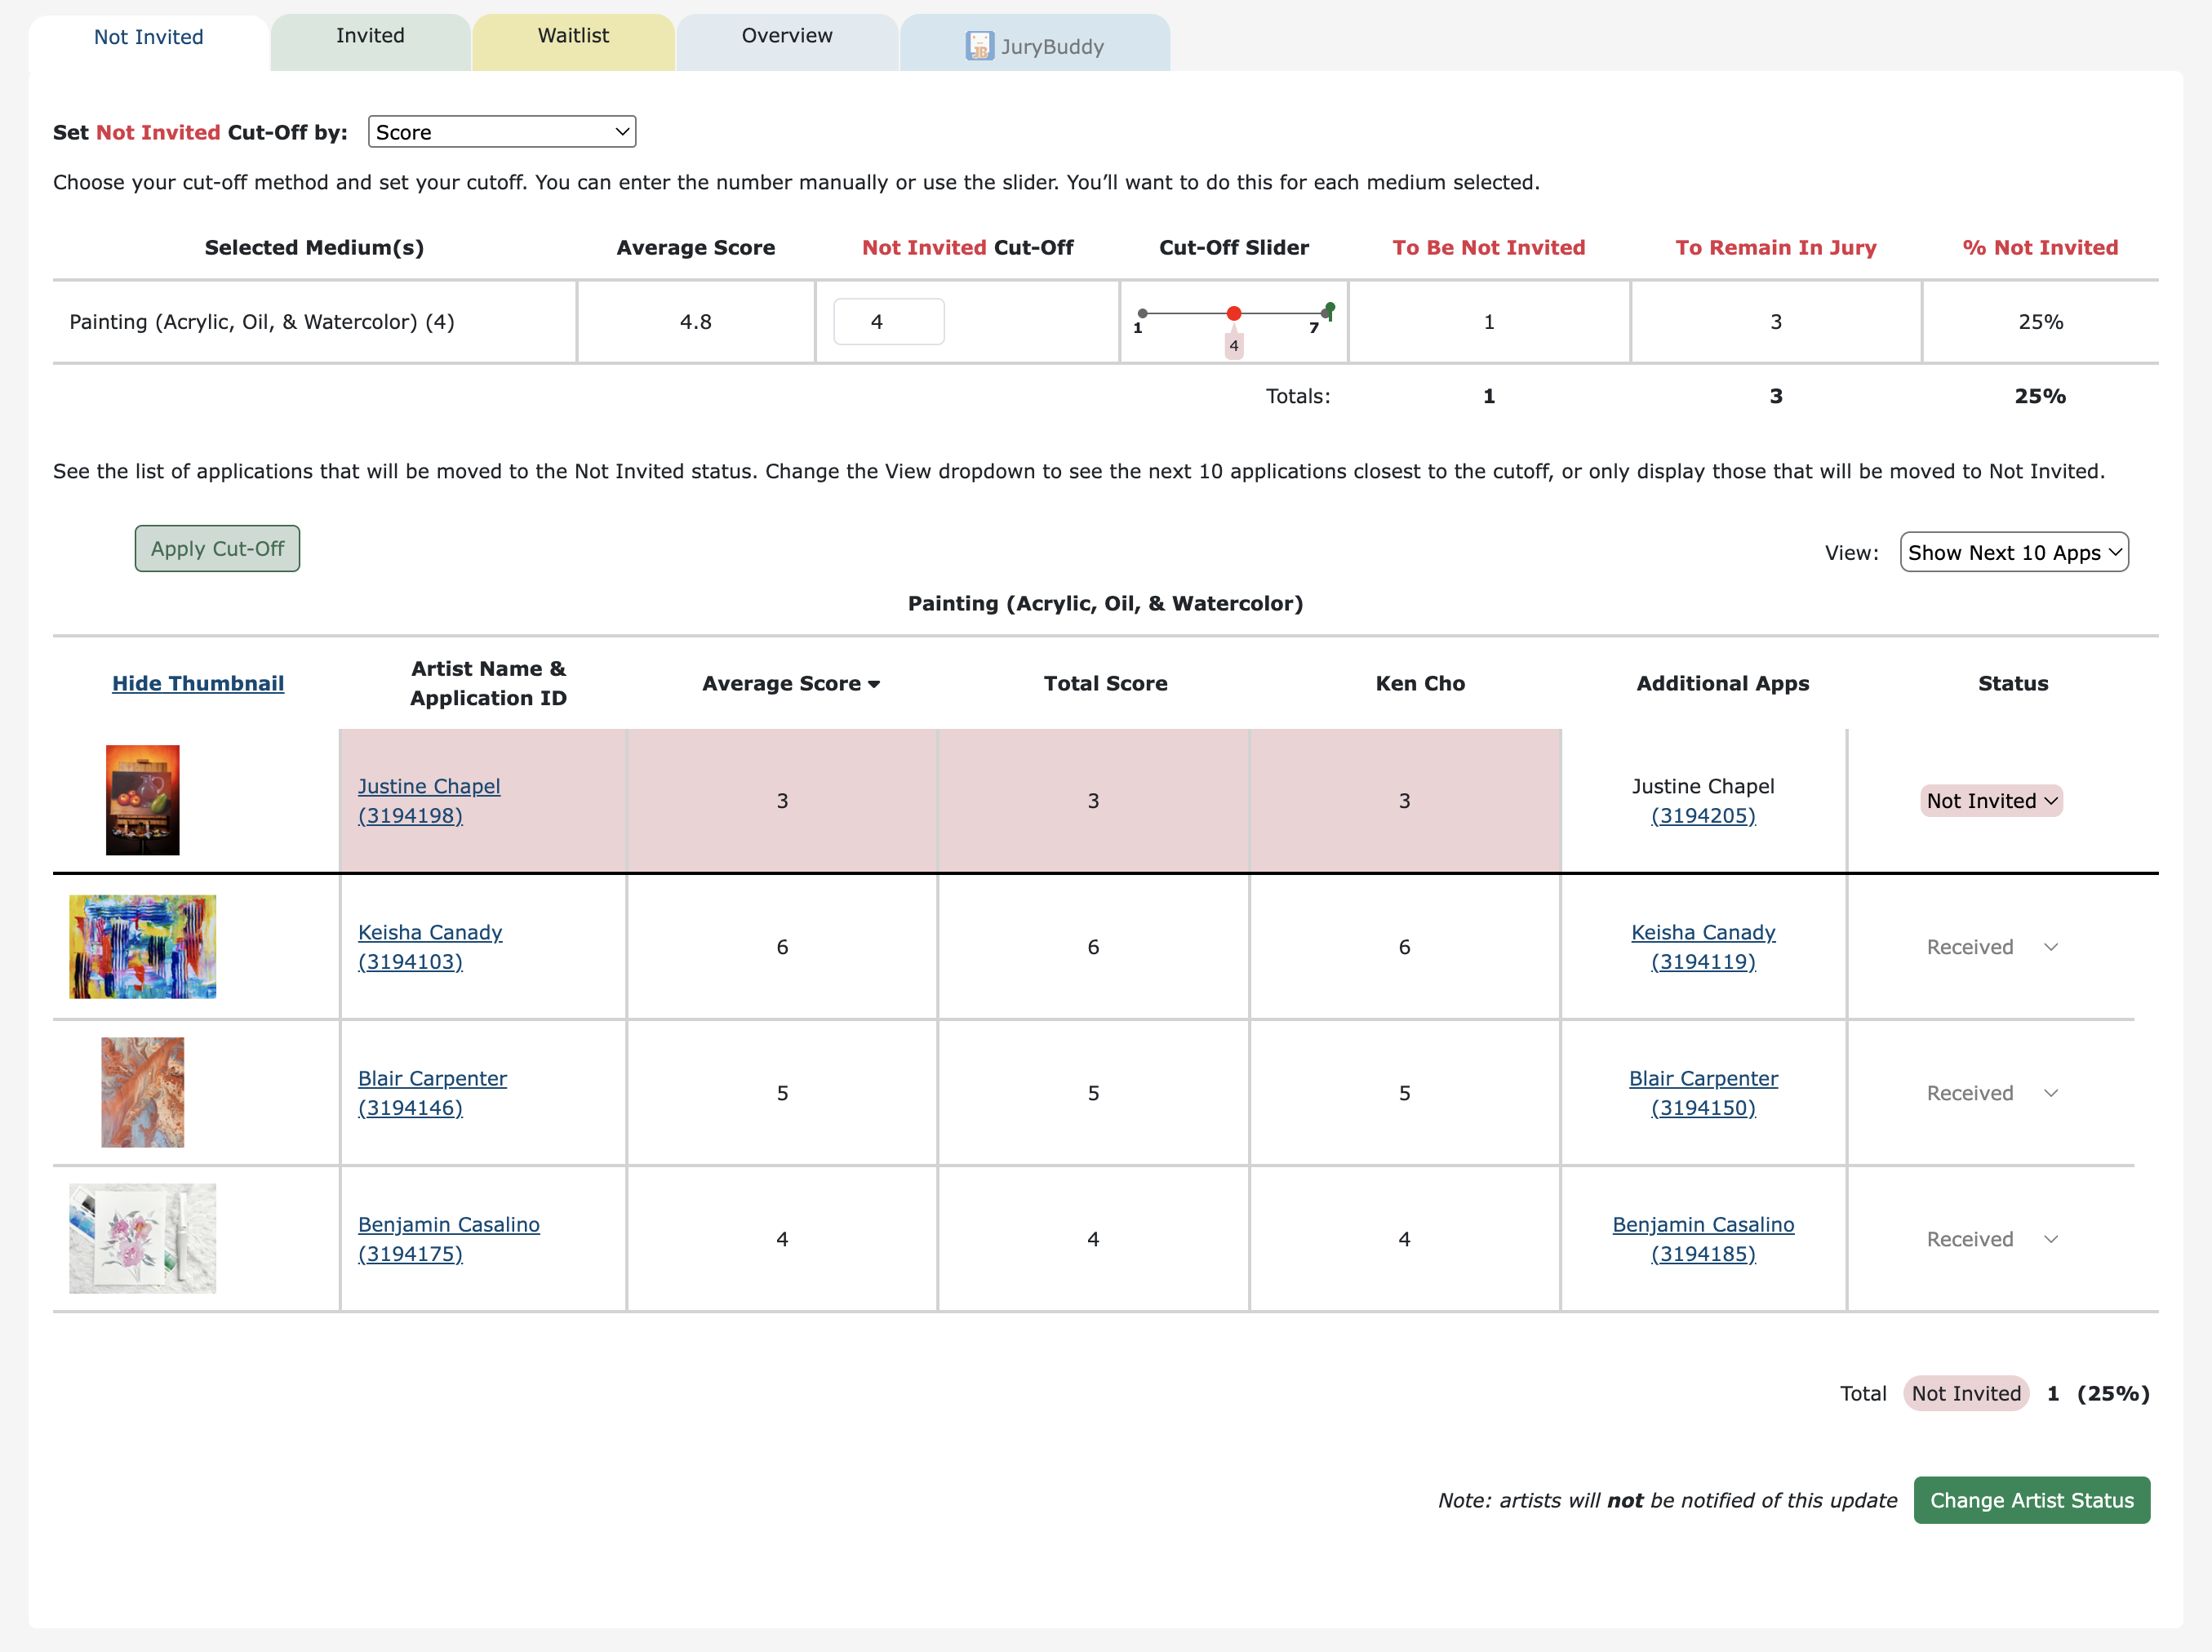
After you select your cut-off method, a table will appear for each selected medium category with the following details:
Selected mediums
Average score per medium
Adjustable cut-off box and slider
The count of those who would not be invited based on your set cut-off
The count of those who will remain in the jury pool after updating the statuses
The percent of applications to be Not Invited.
Review the cutoff score or percentage. If you want to change the default cutoff for either group, you can use the slider or cutoff box to adjust the value and see how the numbers and applicants change.
On the Not Invited tab, any applicants with scores below this value will be slated for removal.
On the Invited tab, any applicants with scores equal to or above this value will be slated for invitation.
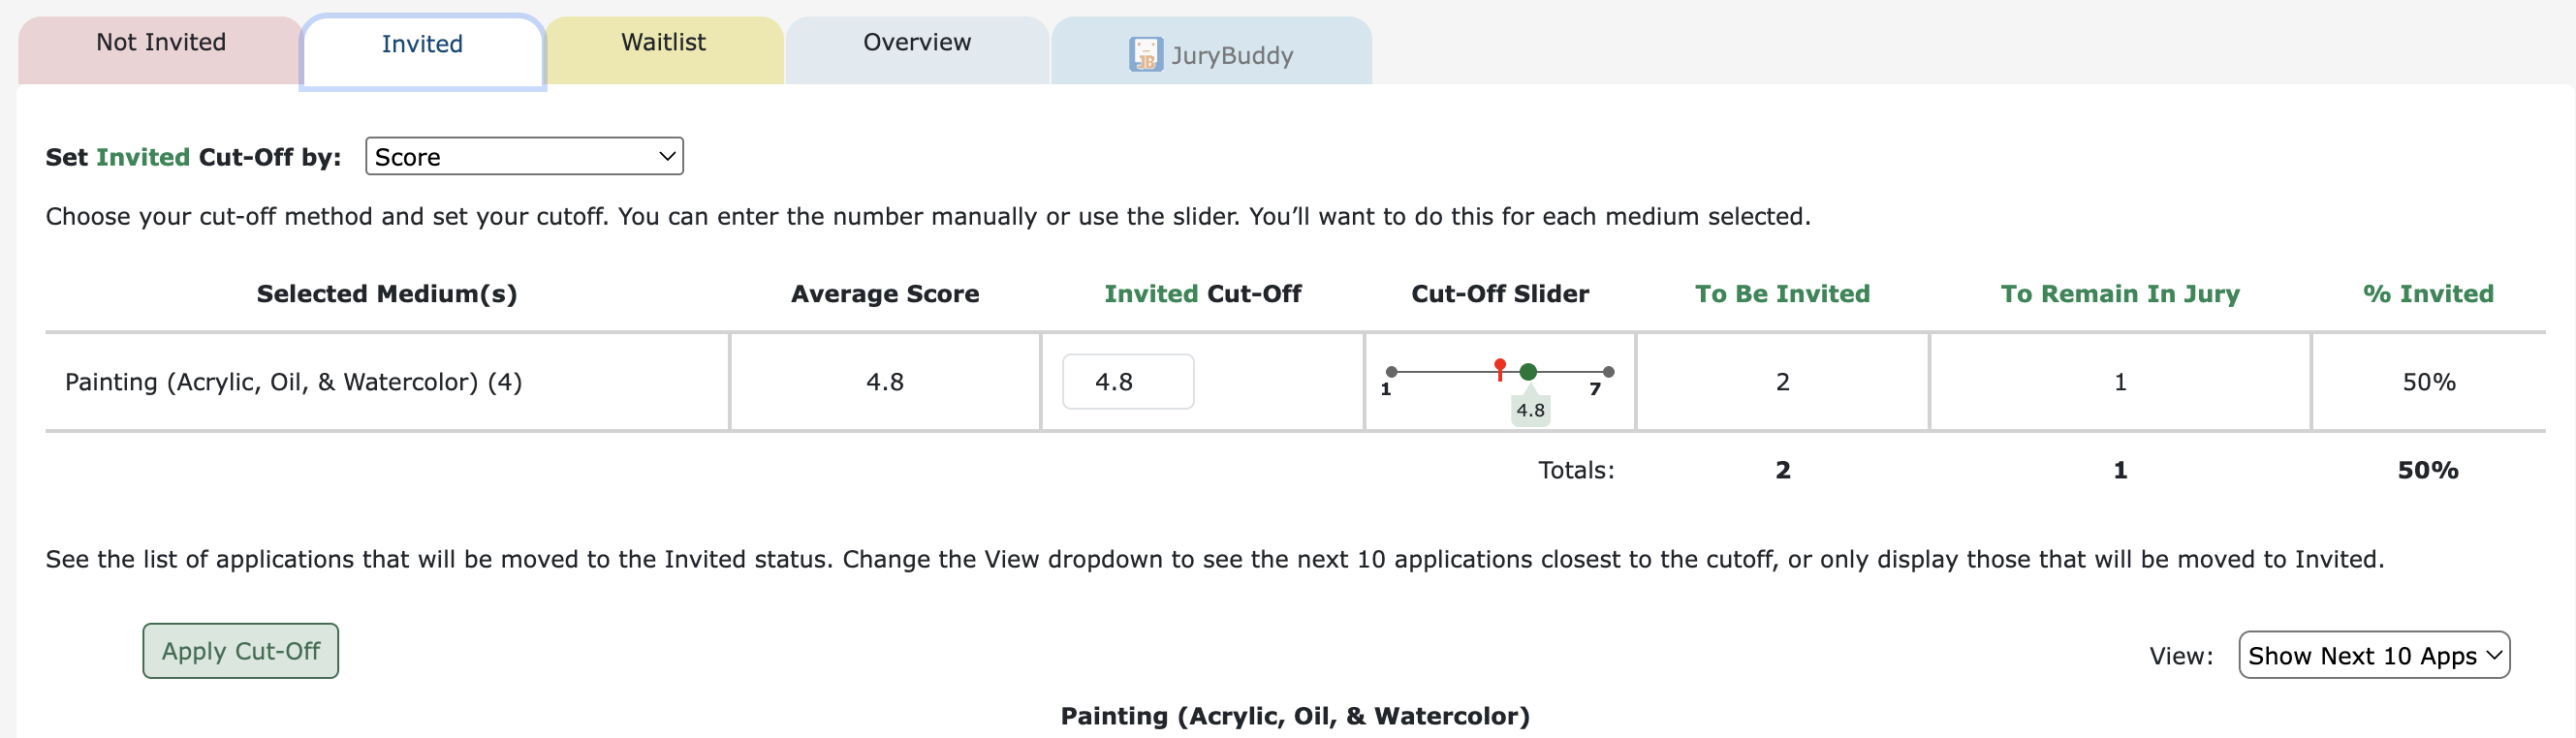
Click Apply Cut-Off to review the list of artists who fall above or below your cutoff, separated by medium.
⚡TIP: Use the View dropdown to see or hide the next 10 closest scoring applications. These are the white rows with the application status grayed out.
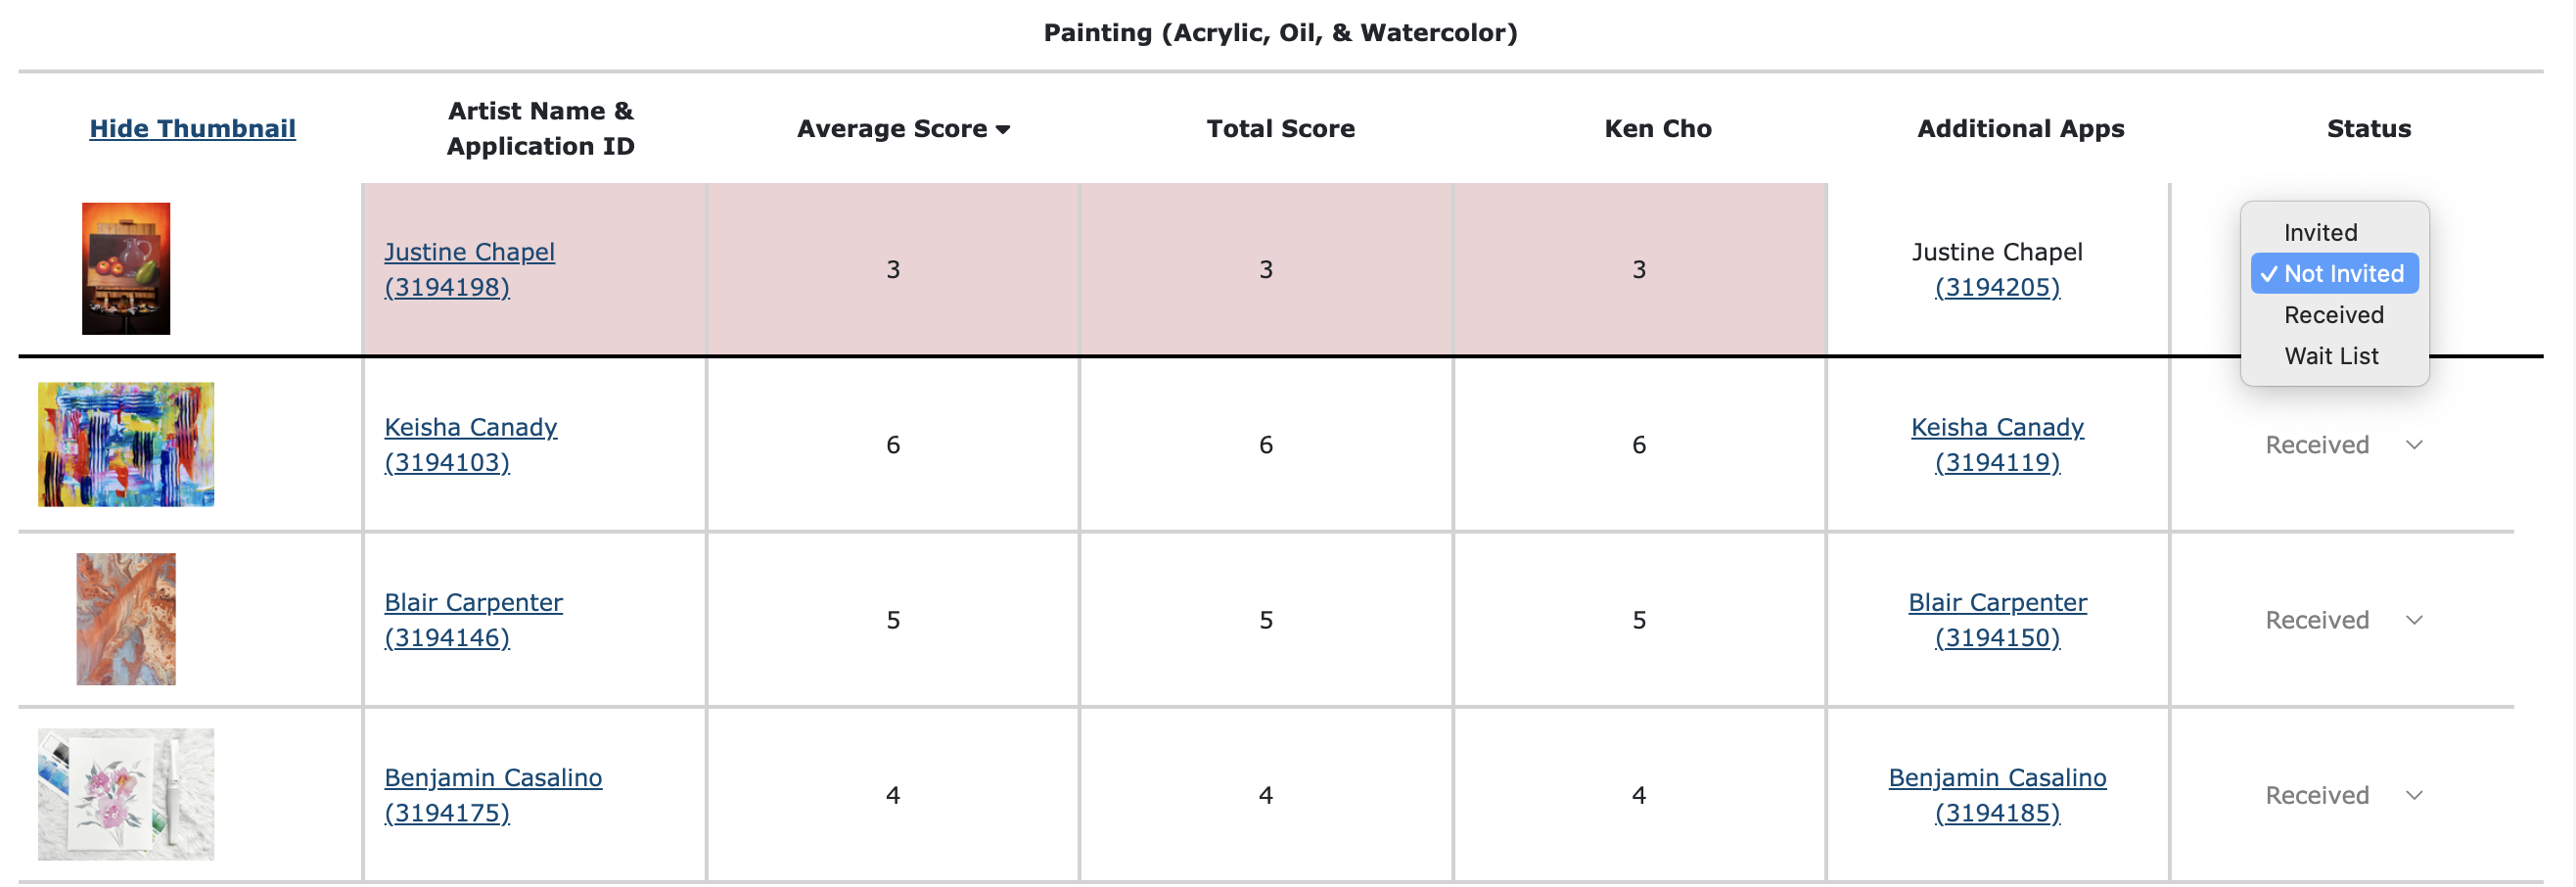
Use the drop-down menus to change artists' statuses, as needed.
Keep artists in the jury pool: Change status to Received.
Move to Waitlist: Change status to waitlist.
Add to Invited pool: Change status to Invited.
Add to Rejected pool: Change status to Not Invited
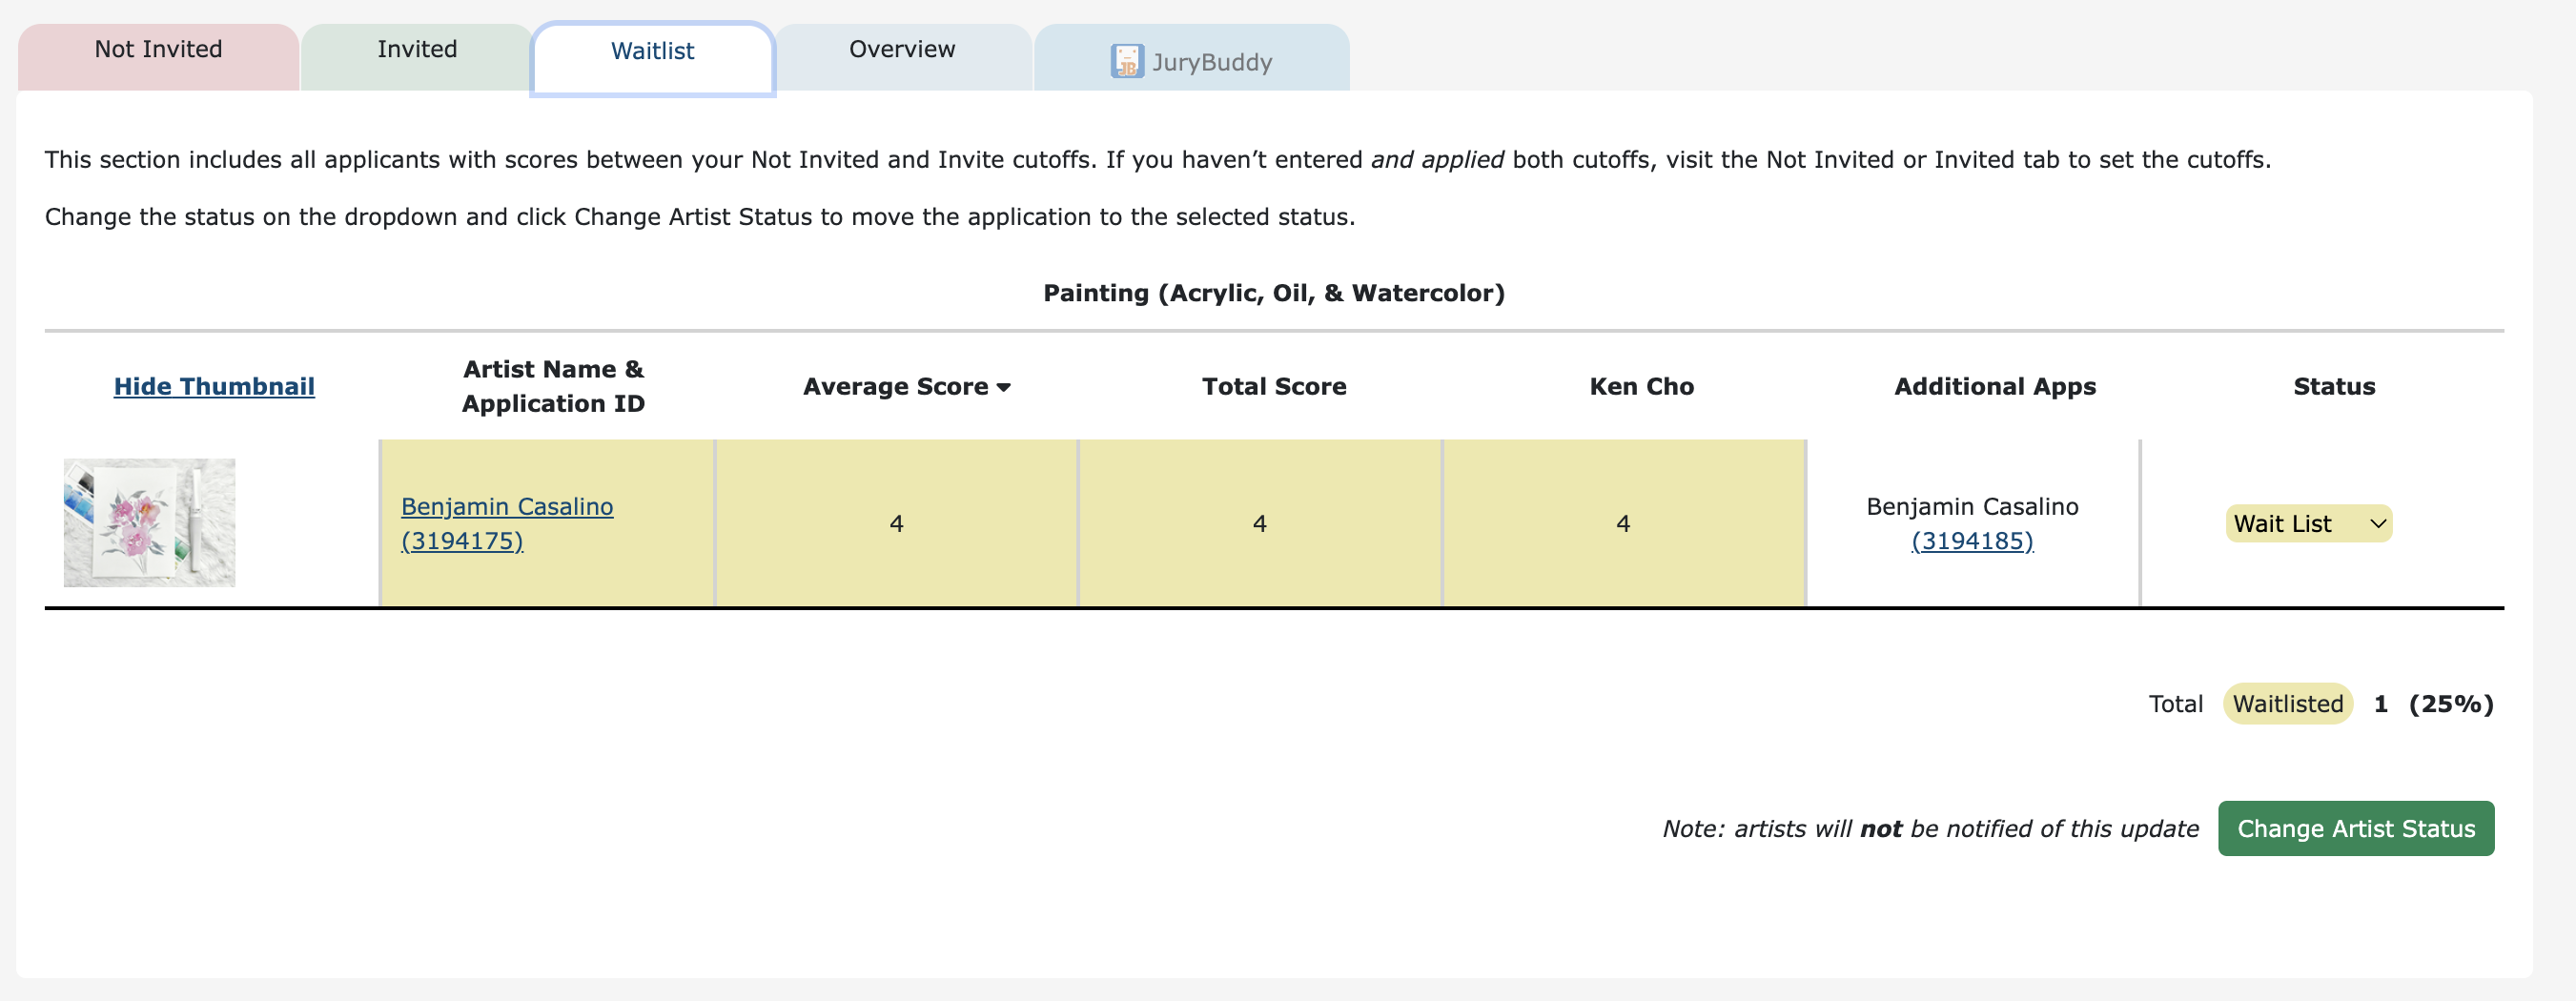
After reviewing applicants in the Not Invited and Invited tabs, go to the Waitlist tab to see applicants who scored above your Not Invited Cutoff and below your Invited cutoff. The Waitlist pool will only appear after you have entered and applied cutoffs for Invited and Not Invited groups.
After making any adjustments to the Waitlist, if needed, continue on to the Overview tab to see your final list of applicants and their statuses.
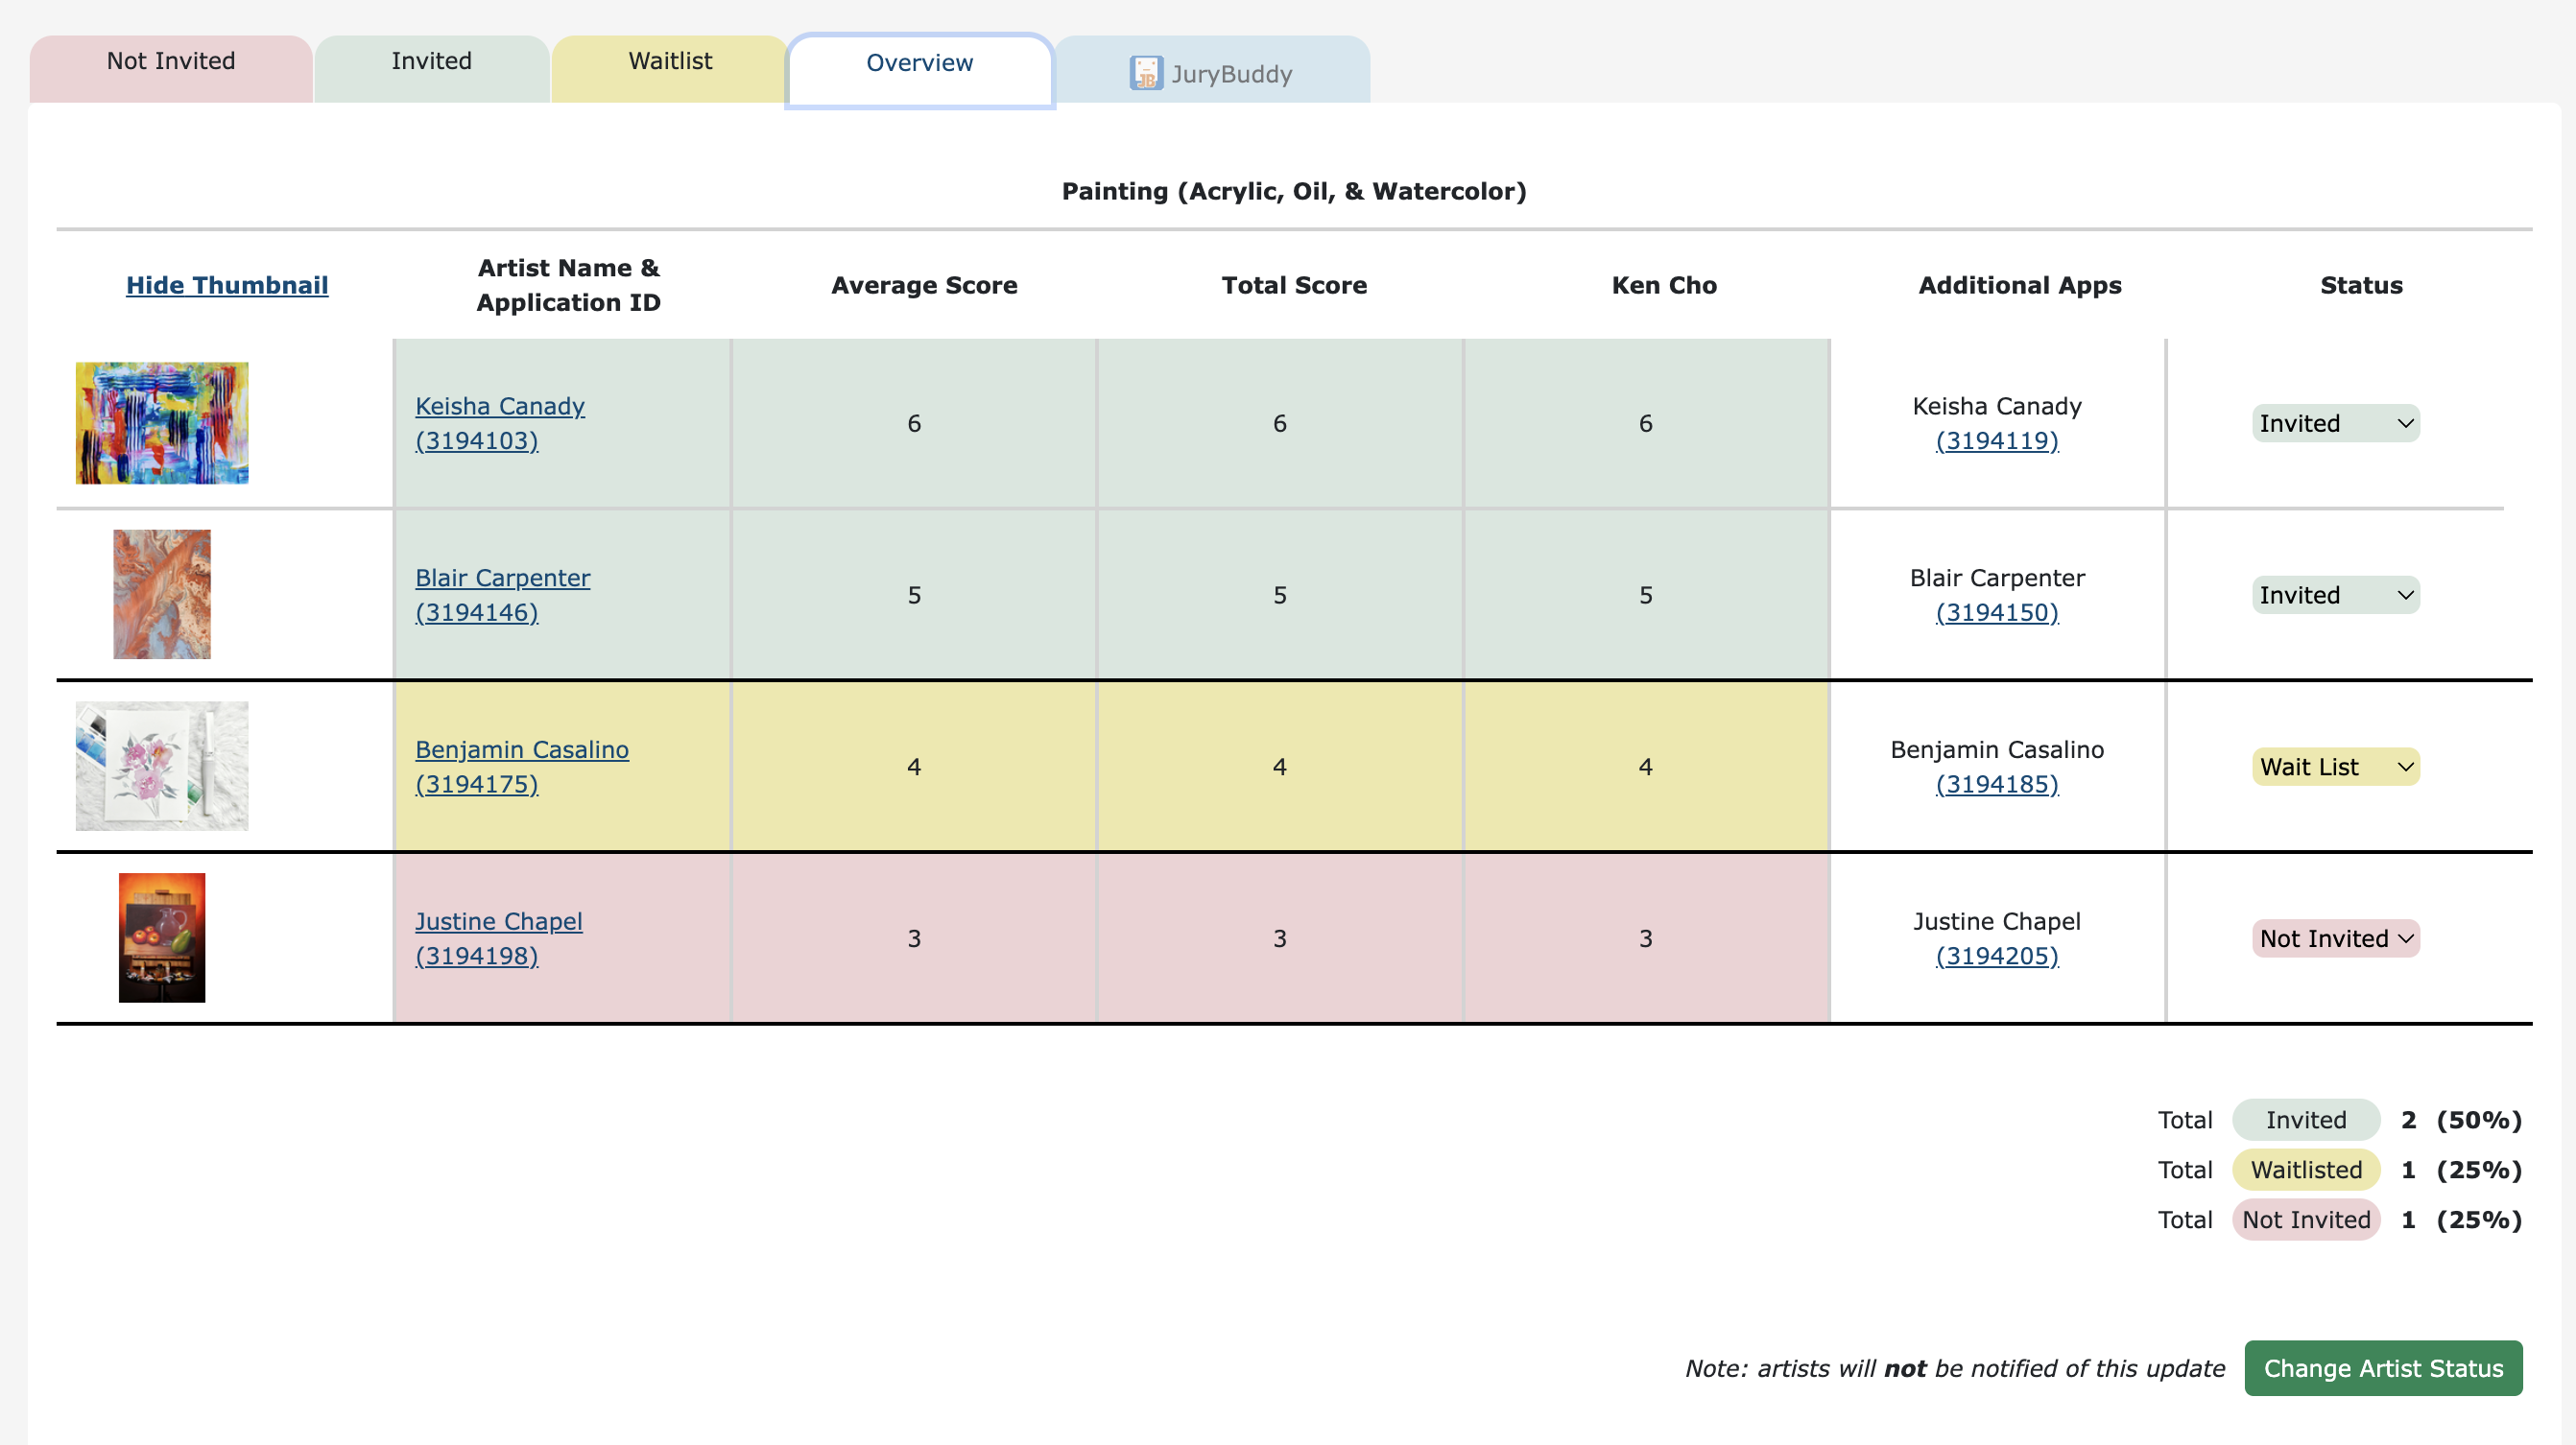
⚡TIP: If you need to make adjustments, either choose a new status next to each applicant that needs adjusting or go back to the Not Invited or Invited tabs to adjust the cutoffs.
When you're ready, click Change Artist Status. This will update and move all applicants to their respective statuses as listed on the tab you are on.
Need to adjust your total numbers or modify your results? Move any applications you want to reevaluate back to the Received status and return to the Change Statuses tab to adjust your cutoffs.
Multiple Rounds 🔢
If you’re conducting more than one round:
After adjusting artists’ statuses as needed after round 1, go to the Advance Rounds tab.
Find the Current Round: drop-down and update it to the next round.
Update any other settings you wish to adjust between the rounds on this page and in the Jury Setup tab.
Jurors can now log back in and score the remaining applicants.
After then next round of scoring is finished, repeat the steps for Adjusting Cut-Offs & Reviewing Applications.
Repeat this process for each round as needed until you have your target Invited and Waitlist pools.
Announce Your Jury Results ✉️
Once all jury rounds are complete and you have finalized all application statuses, make sure to email your artists! Artists are not notified automatically by email, and they will not see jury scores and comments unless you choose to merge them into your notification email.
👉 See Emailing Artists in ZAPP to learn more about sending emails through ZAPP.